Build a Perfect Blog with FastAPI: Reply Comment
Takashi Yamamoto
Infrastructure Engineer · Leapcell
In the previous article, we added a basic comment system to our FastAPI blog, allowing users to have discussions around the posts.
However, these comments were one-directional. Others could comment on your posts, but you couldn't reply to their comments.
To make the comment section more interactive, in this article, we will implement a comment reply feature for our blog. Users will be able to reply to existing comments, and these replies will be displayed in a nested (or indented) format to clearly show the hierarchical relationship.
Step 1: Update the Data Model
To implement the reply feature, we need to establish a parent-child relationship between comments. A reply is essentially a comment, but it has a "parent comment." We will achieve this by adding a self-referencing relationship to the Comment model.
1. Modify the Comment Model
Open the models.py file and add the parentId, parent, and replies attributes to the Comment model.
# models.py
import uuid
from datetime import datetime
from typing import Optional, List
from sqlmodel import Field, SQLModel, Relationship

class User(SQLModel, table=True):
    id: Optional[uuid.UUID] = Field(default_factory=uuid.uuid4, primary_key=True)
    username: str = Field(unique=True, index=True)
    password: str
    comments: List["Comment"] = Relationship(back_populates="user")

class Post(SQLModel, table=True):
    id: Optional[uuid.UUID] = Field(default_factory=uuid.uuid4, primary_key=True)
    title: str
    content: str
    createdAt: datetime = Field(default_factory=datetime.utcnow, nullable=False)
    comments: List["Comment"] = Relationship(back_populates="post")

class Comment(SQLModel, table=True):
    id: Optional[uuid.UUID] = Field(default_factory=uuid.uuid4, primary_key=True)
    content: str
    createdAt: datetime = Field(default_factory=datetime.utcnow, nullable=False)

    postId: uuid.UUID = Field(foreign_key="post.id")
    userId: uuid.UUID = Field(foreign_key="user.id")

    post: Post = Relationship(back_populates="comments")
    user: User = Relationship(back_populates="comments")

    # --- New Fields ---

    # Stores the parent comment's ID, can be null
    parentId: Optional[uuid.UUID] = Field(default=None, foreign_key="comment.id")

    # Defines the relationship with the parent comment
    # sa_relationship_kwargs helps SQLAlchemy correctly handle the self-referencing relationship
    parent: Optional["Comment"] = Relationship(
        back_populates="replies",
        sa_relationship_kwargs=dict(remote_side="Comment.id")
    )

    # Defines the relationship with the list of child comments (replies)
    replies: List["Comment"] = Relationship(back_populates="parent")
parentId: An optional field that acts as a foreign key, pointing to theidof thecommenttable itself. For top-level comments,parentIdwill beNone.parentandreplies: These useRelationshipto define the parent-child relationship within theCommentmodel. This allows us to easily access all replies to a comment viacomment.replies.
Since we configured the create_db_and_tables function in main.py to automatically detect model changes and update the database schema on application startup, we don't need to manually execute any SQL.
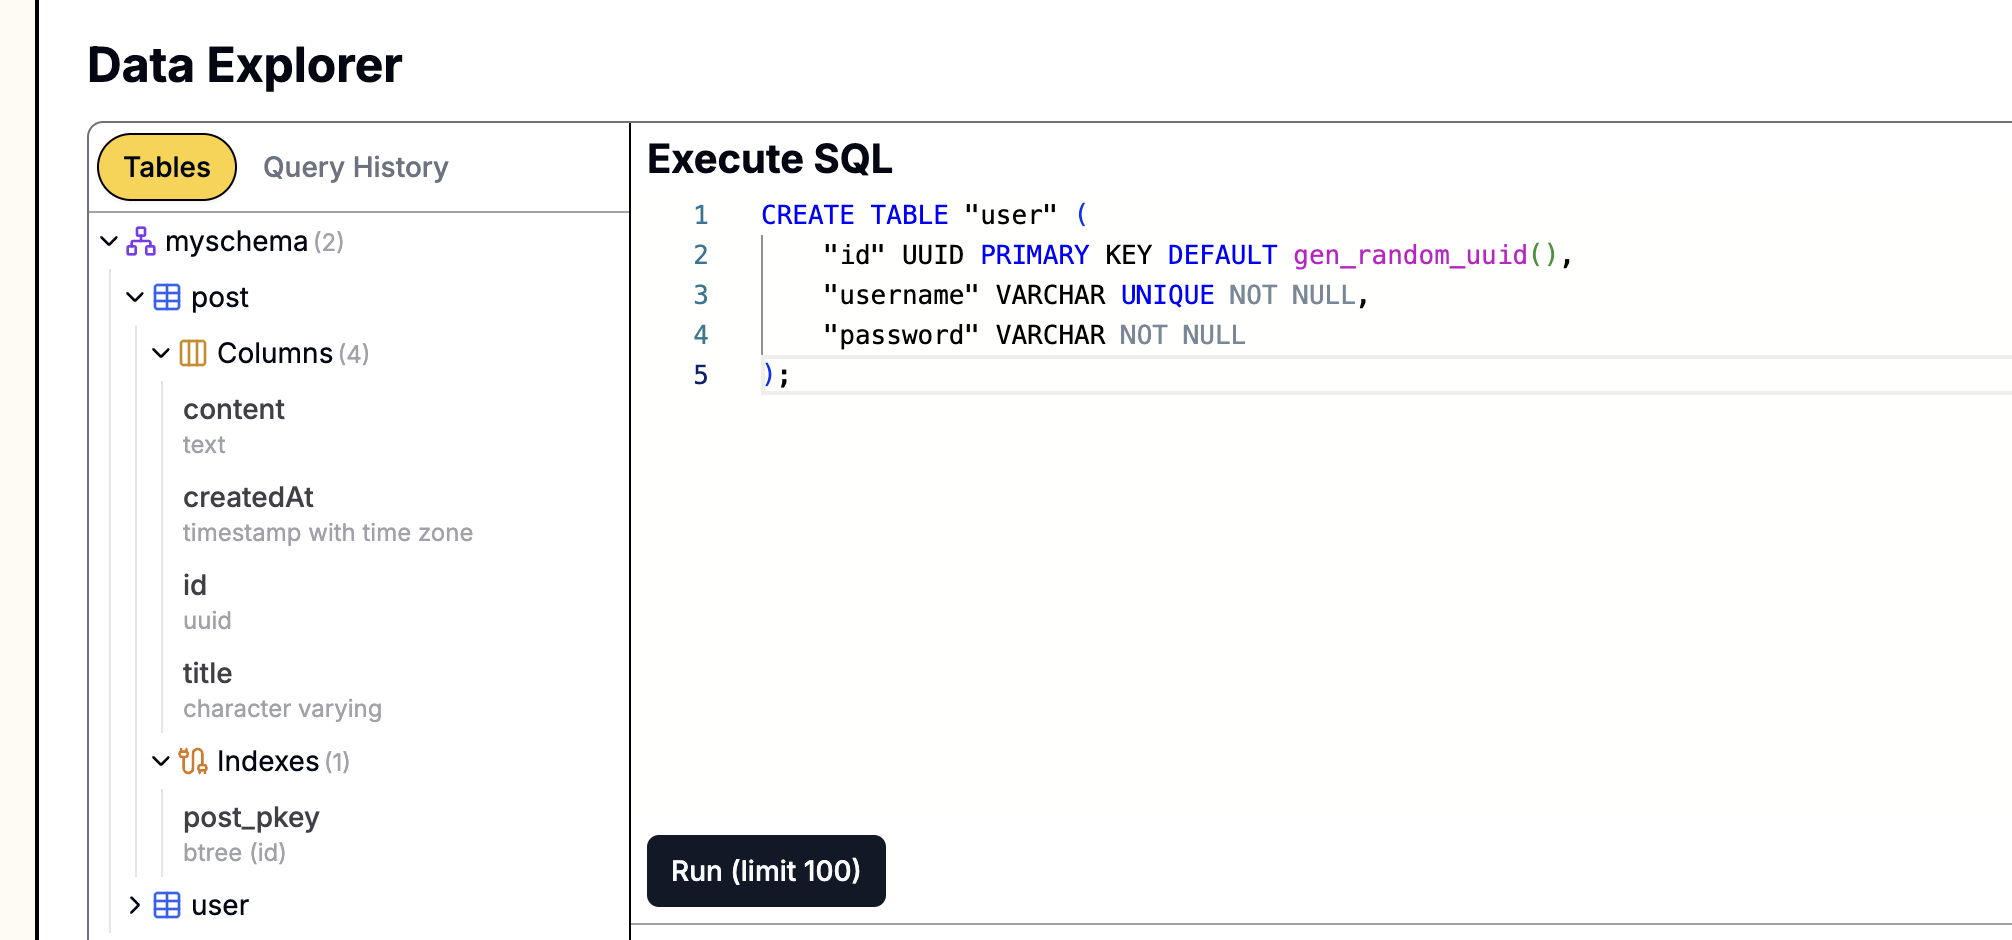
If you need to execute SQL manually and your database is created on Leapcell,

you can easily run SQL statements through its graphical interface. Just go to the Database management page on the website, paste the statement into the SQL interface, and execute it.
Step 2: Adjust the Comment Service
The service layer needs to be adjusted to associate parent comments when creating a new comment and to structure the flat list of comments into a tree-like structure when querying.
Open comments_service.py and make the following changes:
# comments_service.py
import uuid
from typing import List, Optional
from sqlmodel import Session, select
from models import Comment

def structure_comments(comments: List[Comment]) -> List[Comment]:
    """Converts a flat list of comments into a tree structure"""
    comment_map = {}
    # First, initialize the replies list and put all comments into a map for quick lookup
    for comment in comments:
        comment.replies = []
        comment_map[comment.id] = comment

    root_comments = []
    # Iterate through the comments to build the parent-child relationships
    for comment in comments:
        if comment.parentId:
            parent_comment = comment_map.get(comment.parentId)
            if parent_comment:
                parent_comment.replies.append(comment)
        else:
            root_comments.append(comment)

    return root_comments

def get_comments_by_post_id(post_id: uuid.UUID, session: Session) -> List[Comment]:
    """Finds all comments for a post and structures them into a tree"""
    statement = select(Comment).where(Comment.postId == post_id).order_by(Comment.createdAt)
    comments = session.exec(statement).all()
    # Return the structured comment tree
    return structure_comments(comments)

def create_comment(
    content: str,
    user_id: uuid.UUID,
    post_id: uuid.UUID,
    session: Session,
    parent_id: Optional[uuid.UUID] = None  # Add an optional parent_id parameter
) -> Comment:
    """Creates a new comment, optionally linking it to a parent comment"""
    new_comment = Comment(
        content=content,
        userId=user_id,
        postId=post_id,
        parentId=parent_id  # Set the parentId
    )
    session.add(new_comment)
    session.commit()
    session.refresh(new_comment)
    return new_comment
Logic Explanation:
get_comments_by_post_idnow fetches all comments for a post (both top-level and replies) and then callsstructure_commentsto process them.- The new
structure_commentsmethod is the core of this logic. It iterates through all comments: if a comment has aparentId, it is placed into its parent'srepliesarray; if not, it is a top-level comment. The function ultimately returns a list of all top-level comments, each potentially containing a nested list of replies. - The
create_commentmethod adds an optionalparent_idparameter. If this ID is provided, the newly created comment will be associated with the corresponding parent comment.
Step 3: Update the Route
The controller needs to receive the optional parentId from the request body and pass it to the service. This change is very simple.
Open routers/comments.py:
# routers/comments.py
import uuid
from typing import Optional
from fastapi import APIRouter, Depends, Form
from fastapi.responses import RedirectResponse
from sqlmodel import Session

from database import get_session
import comments_service
from auth_dependencies import login_required

router = APIRouter()

@router.post("/posts/{post_id}/comments")
def create_comment_for_post(
    post_id: uuid.UUID,
    content: str = Form(...),
    parentId: Optional[str] = Form(None), # <-- Receive optional parentId
    user: dict = Depends(login_required),
    session: Session = Depends(get_session)
):
    user_id = uuid.UUID(user["id"])

    # Convert parentId to UUID type if it exists
    parent_uuid = uuid.UUID(parentId) if parentId else None

    comments_service.create_comment(
        content=content,
        user_id=user_id,
        post_id=post_id,
        session=session,
        parent_id=parent_uuid # Pass parent_id to the service
    )

    return RedirectResponse(url=f"/posts/{post_id}", status_code=302)
Step 4: Upgrade the Frontend View
This is the part with the most changes. We need to update the post.html template to recursively render comments and their replies. We also need to add some JavaScript to dynamically display the reply form.
1. Create a Comment Template
To achieve recursive rendering of comments, the best practice is to create a reusable "macro."
Create a new file named _comment.html in the templates directory:
{# templates/_comment.html #}
{% macro render_comment_tree(comments, user, post, depth) %}
  {% for comment in comments %}
    <div class="comment-item" style="margin-left: {{ depth * 20 }}px;">
      <p class="comment-content">{{ comment.content }}</p>
      <small>
        By <strong>{{ comment.user.username }}</strong> on {{ comment.createdAt.strftime('%Y-%m-%d') }}
      </small>
      {% if user %}
        <button class="reply-btn" data-comment-id="{{ comment.id }}">Reply</button>
      {% endif %}
    </div>

    {# Recursively call itself to render replies #}
    {% if comment.replies %}
      {{ render_comment_tree(comment.replies, user, post, depth + 1) }}
    {% endif %}
  {% endfor %}
{% endmacro %}
This template defines a macro named render_comment_tree. It iterates through the passed comments array and recursively calls itself for each comment's replies array, incrementing the depth to create a visual indentation.
2. Update post.html
Now, modify templates/post.html to use this new macro and add a universal reply form with the corresponding JavaScript logic.
{# templates/post.html #} {# ... post content section ... #} <div class="post-content">{{ post.content | replace('\n', '<br>') | safe }}</div> </article> {# Import the macro #} {% from '_comment.html' import render_comment_tree %} <section class="comments-section"> <h3>Comments</h3> <div class="comment-list"> {% if comments %} {# Call the macro to render the comment tree #} {{ render_comment_tree(comments, user, post, 0) }} {% else %} <p>No comments yet. Be the first to comment!</p> {% endif %} </div> {% if user %} <form id="comment-form" action="/posts/{{ post.id }}/comments" method="POST" class="comment-form"> <h4>Leave a Comment</h4> <div class="form-group"> <textarea name="content" rows="4" placeholder="Write your comment here..." required></textarea> {# Add a hidden parentId input field #} <input type="hidden" name="parentId" id="parentIdInput" value="" /> </div> <button type="submit">Submit Comment</button> <button type="button" id="cancel-reply-btn" style="display: none;">Cancel Reply</button> </form> {% else %} <p><a href="/auth/login">Login</a> to leave a comment.</p> {% endif %} </section> <script> document.addEventListener('DOMContentLoaded', () => { const commentForm = document.getElementById('comment-form'); const parentIdInput = document.getElementById('parentIdInput'); const formTitle = commentForm.querySelector('h4'); const cancelReplyBtn = document.getElementById('cancel-reply-btn'); const commentList = document.querySelector('.comment-list'); commentList.addEventListener('click', (e) => { if (e.target.classList.contains('reply-btn')) { const commentId = e.target.getAttribute('data-comment-id'); const commentItem = e.target.closest('.comment-item'); // Move the form to be directly below the comment being replied to commentItem.after(commentForm); // Set the parentId and update the form title parentIdInput.value = commentId; formTitle.innerText = 'Replying to ' + commentItem.querySelector('strong').innerText; cancelReplyBtn.style.display = 'inline-block'; } }); cancelReplyBtn.addEventListener('click', () => { // Reset the form state parentIdInput.value = ''; formTitle.innerText = 'Leave a Comment'; cancelReplyBtn.style.display = 'none'; // Move the form back to the bottom of the comments section document.querySelector('.comments-section').appendChild(commentForm); }); }); </script> <a href="/" class="back-link">← Back to Home</a> {% include "_footer.html" %}
JavaScript Logic Explanation:
- There is only one comment form on the page.
- When a user clicks the "Reply" button on a comment, the JavaScript gets that comment's ID and sets it as the value of the hidden
parentIdinput field in the form. - At the same time, it moves the entire form to be immediately after the comment being replied to and updates the form's title, providing clear context to the user.
- A "Cancel Reply" button appears when replying. Clicking it resets the form and moves it back to the bottom of the comment section.
Running and Testing
Now, restart your application:
uvicorn main:app --reload
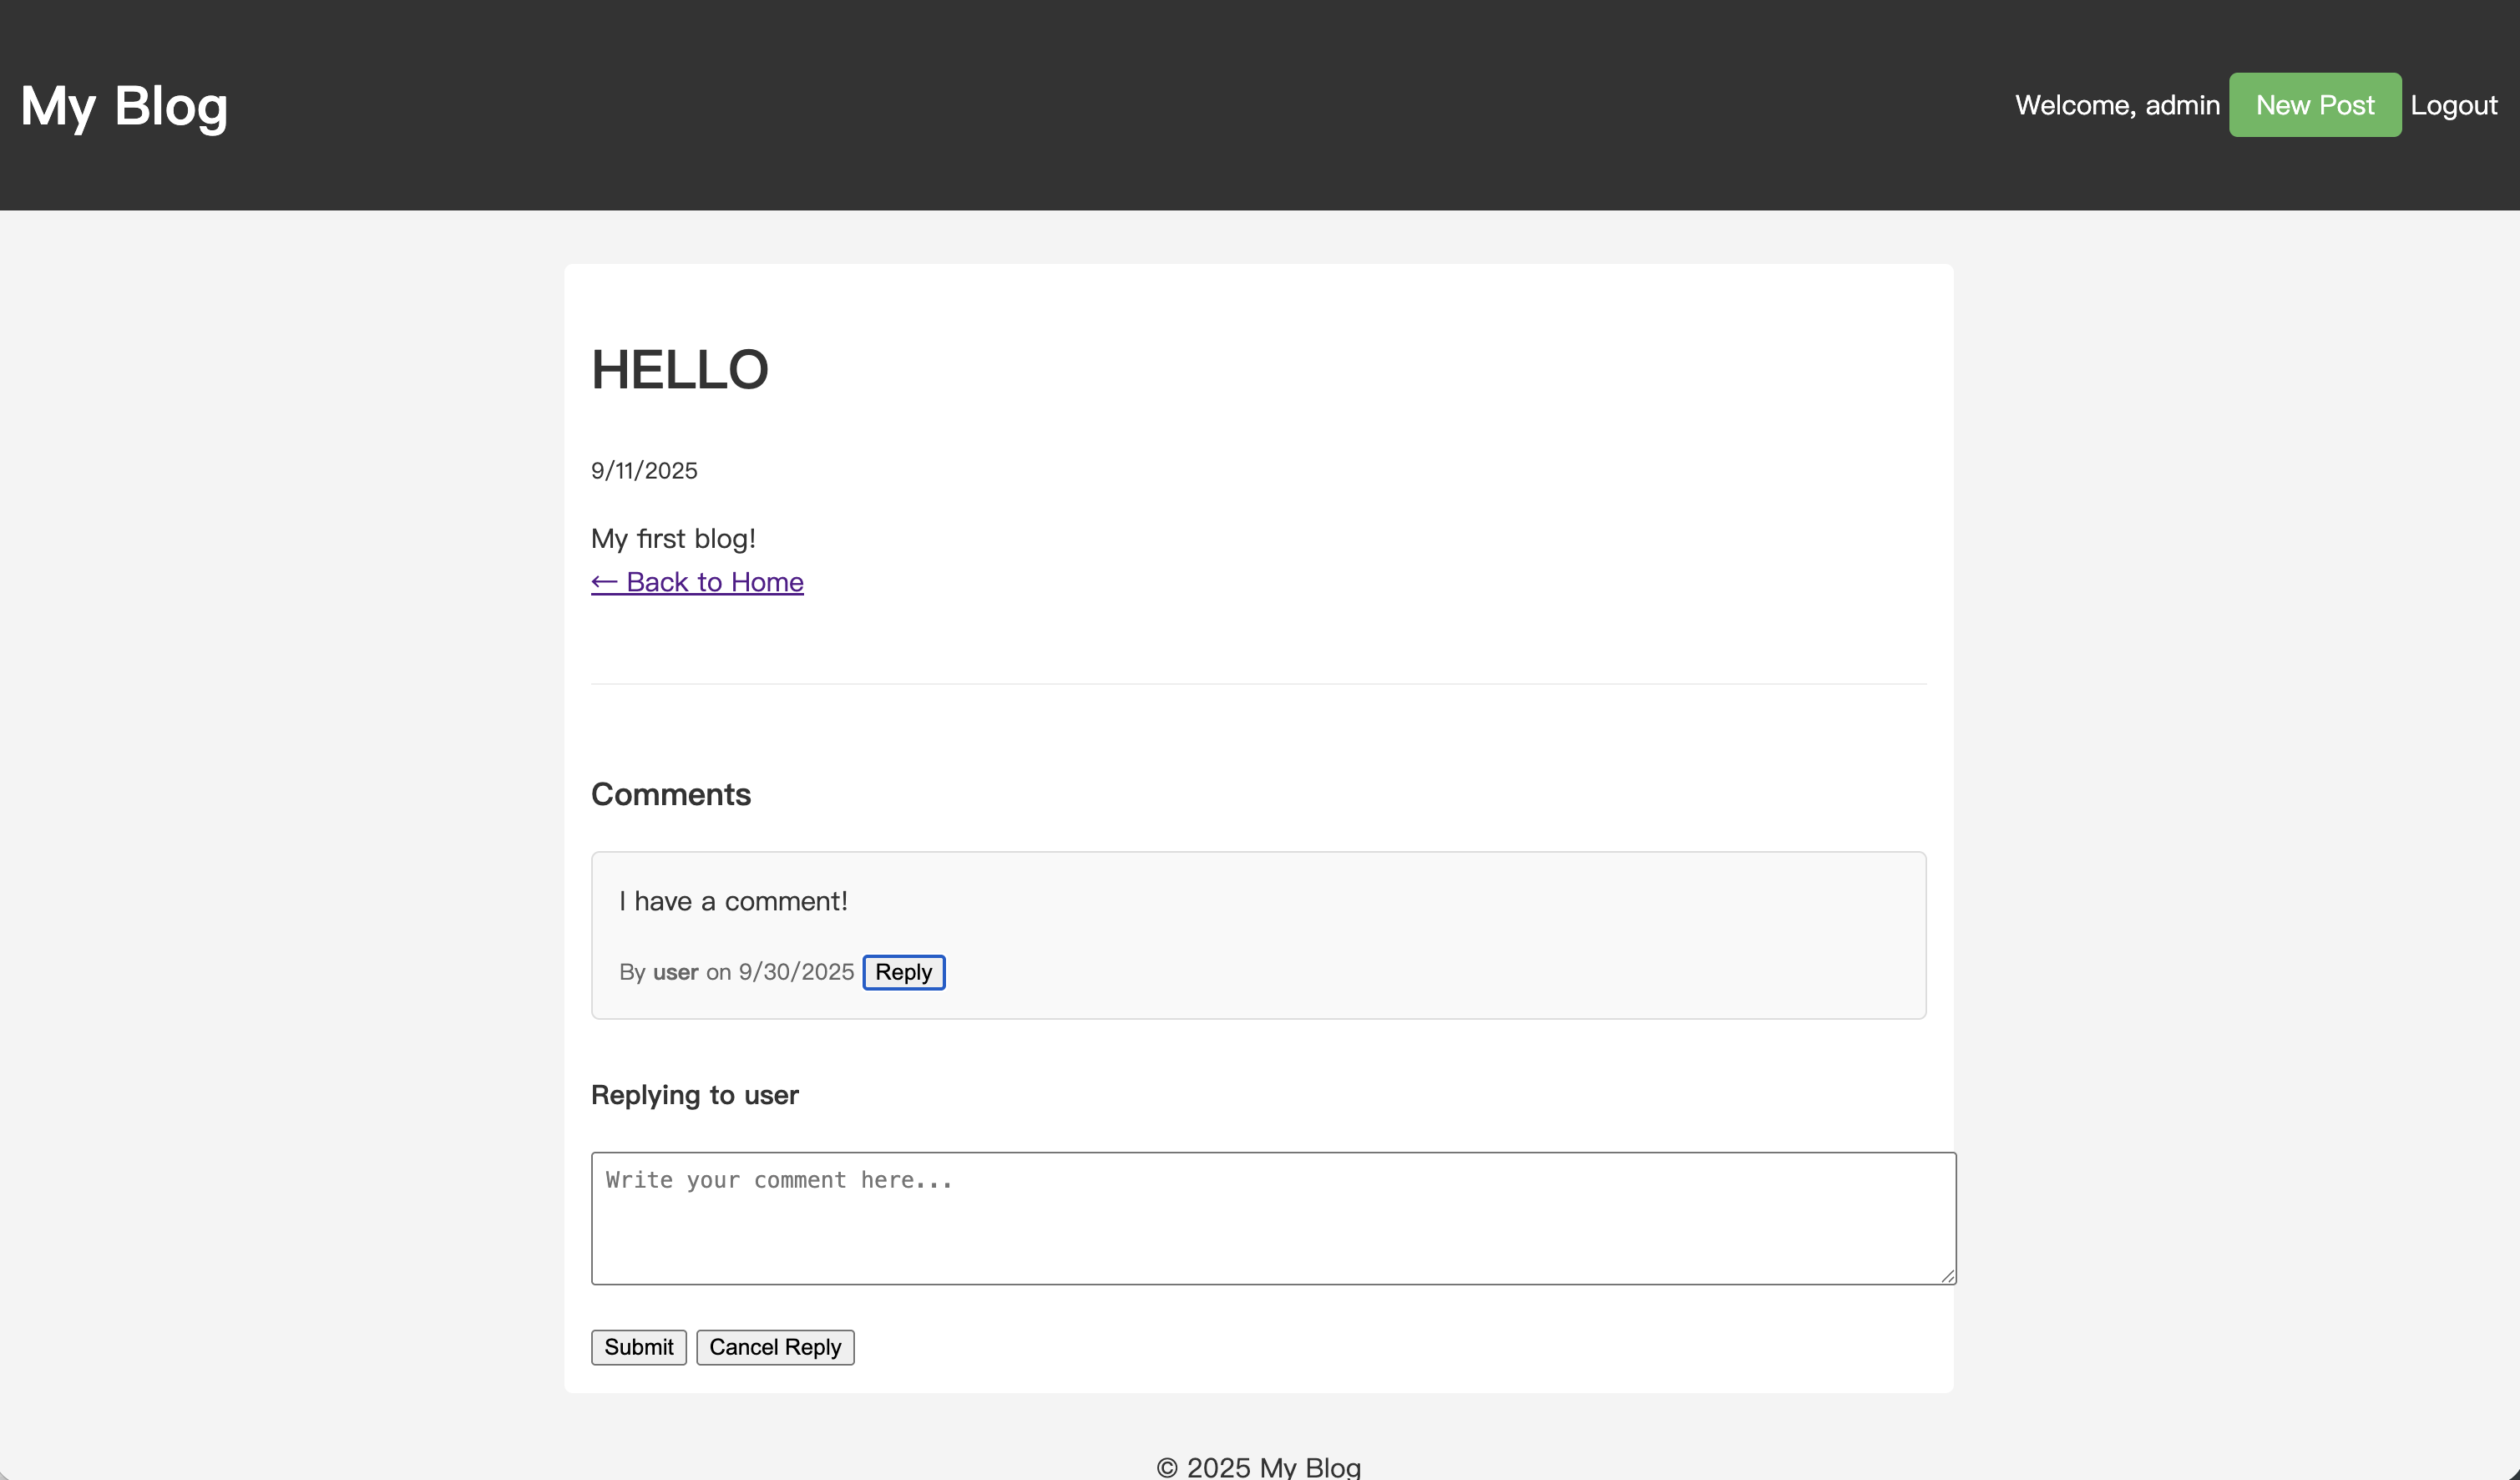
Open your browser and navigate to the detail page of any post. Find a comment and click the "Reply" button next to it.
You will see the comment form move below that comment.
Enter your content and submit. After the page refreshes, you will see your reply appear indented below the parent comment.
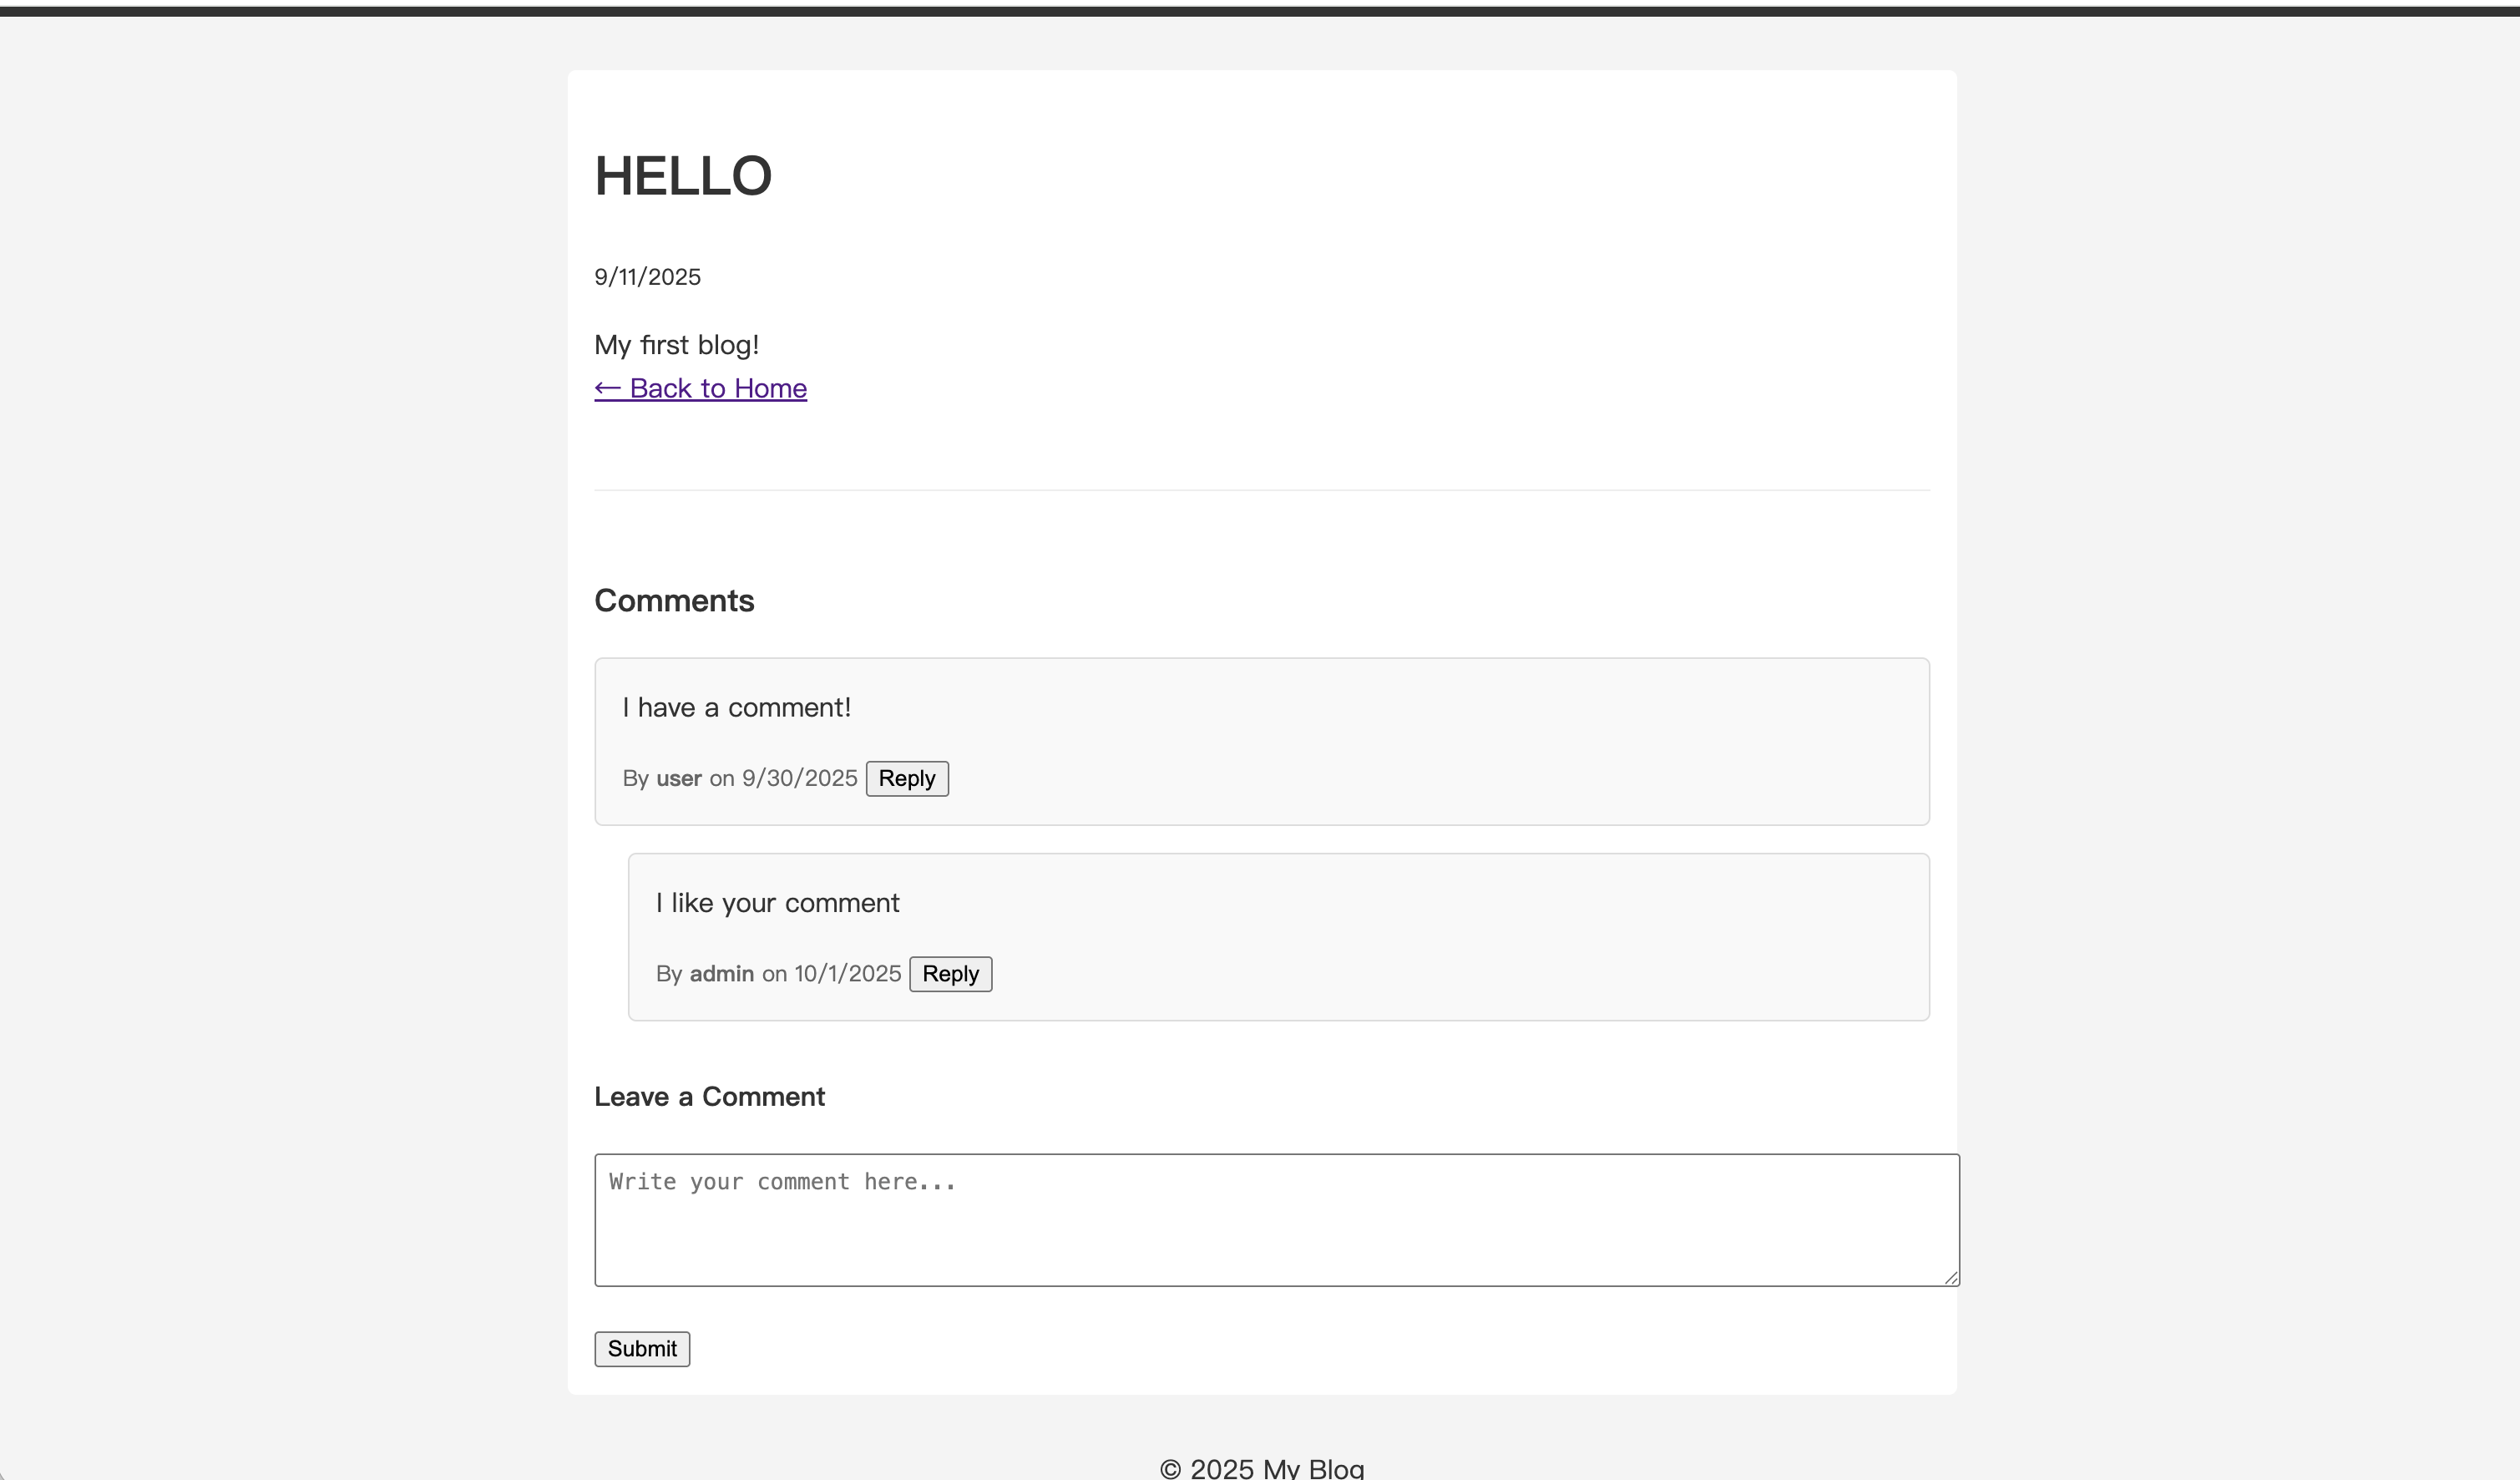
You can continue to reply to replies, creating multiple levels of conversation.
With that, you now have a complete comment reply system.