훌륭한 Nest.js 블로그 만들기: 댓글 시스템
Takashi Yamamoto
Infrastructure Engineer · Leapcell

이전 튜토리얼에서 사용자 인증 구현을 위해 express-session을 사용했습니다. 이제 사용자는 블로그에 가입하고 로그인할 수 있으며, 로그인이 필요한 라우트를 보호하는 기능도 구현했습니다.
이제 독자와 작성자를 명확하게 구분할 수 있게 되었으므로, 사용자 간의 상호작용을 위한 기능을 추가하기에 좋은 시기 아닌가요?
이 글에서는 블로그의 기본적이면서도 핵심적인 기능인 댓글 시스템을 추가해 보겠습니다.
구체적으로 다음 기능을 구현할 것입니다:
- 각 글 아래에 댓글 목록 표시.
- 로그인한 사용자가 댓글을 작성할 수 있도록 허용.
1단계: 댓글 데이터 모델 생성
이전의 글(Posts) 및 사용자(Users)와 마찬가지로, 댓글에도 자체 데이터베이스 테이블과 해당 엔티티 파일이 필요합니다.
데이터베이스 테이블 생성
먼저 PostgreSQL 데이터베이스에서 comment 테이블을 생성하기 위해 다음 SQL 문을 실행하세요. 이 테이블은 post 테이블 및 user 테이블과 연결됩니다.
CREATE TABLE "comment" (
    "id" UUID PRIMARY KEY DEFAULT gen_random_uuid(),
    "content" TEXT NOT NULL,
    "createdAt" TIMESTAMPTZ NOT NULL DEFAULT NOW(),
    "postId" UUID REFERENCES "post"("id") ON DELETE CASCADE,
    "userId" UUID REFERENCES "user"("id") ON DELETE CASCADE
);
ON DELETE CASCADE는 글 또는 사용자가 삭제될 때, 데이터 일관성을 보장하기 위해 관련된 모든 댓글도 자동으로 삭제됨을 의미합니다.
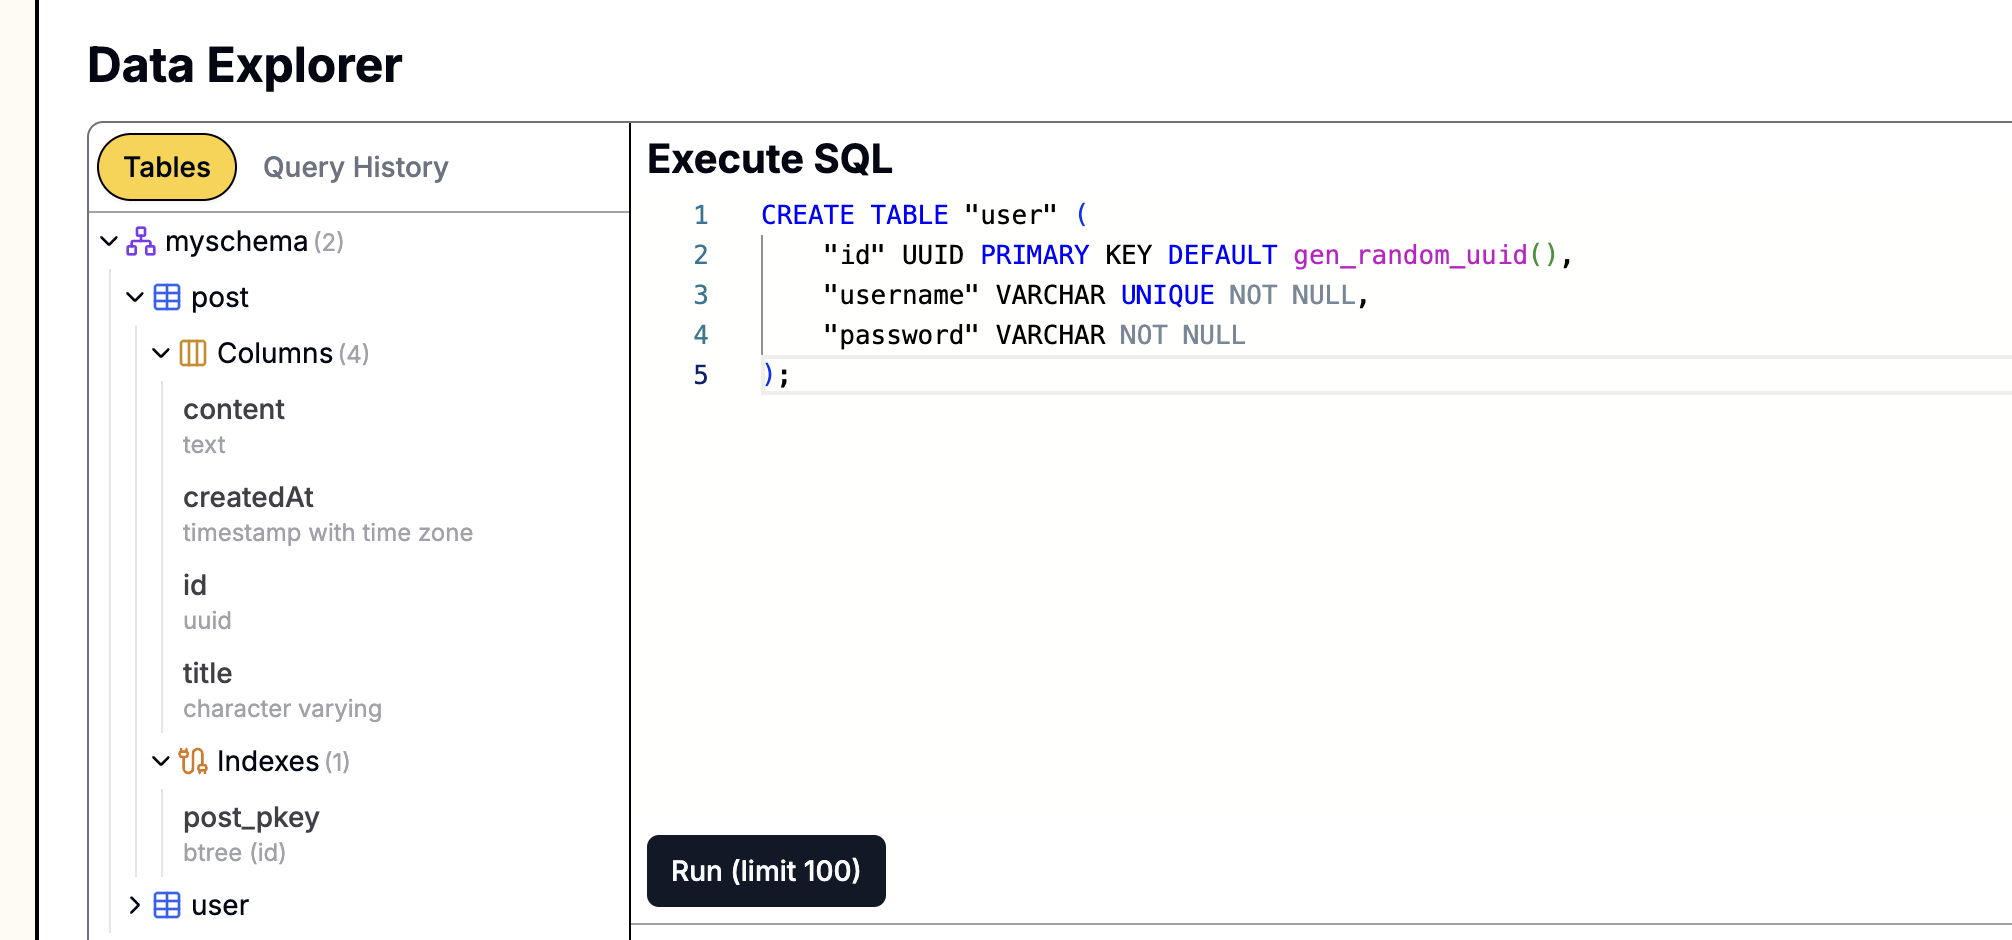
Leapcell에서 데이터베이스를 생성했다면,
그래픽 인터페이스를 사용하여 SQL 문을 쉽게 실행할 수 있습니다. 웹사이트의 데이터베이스 관리 페이지로 이동하여 위의 문을 SQL 인터페이스에 붙여넣고 실행하면 됩니다.

댓글 엔티티 생성
다음으로, 댓글과 관련된 모든 로직을 관리하기 위해 comments 모듈을 생성합니다.
nest generate module comments
nest generate service comments
nest generate controller comments
src/comments 디렉터리에 comment.entity.ts라는 파일을 생성합니다.
// src/comments/comment.entity.ts
import { Entity, Column, PrimaryColumn, CreateDateColumn, ManyToOne } from 'typeorm';
import { User } from '../users/user.entity';
import { Post } from '../posts/post.entity';

@Entity()
export class Comment {
  @PrimaryColumn({ type: 'uuid', default: () => 'gen_random_uuid()' })
  id: string;

  @Column('text')
  content: string;

  @CreateDateColumn()
  createdAt: Date;

  @ManyToOne(() => User, (user) => user.comments)
  user: User;

  @ManyToOne(() => Post, (post) => post.comments)
  post: Post;
}
관련 엔티티 업데이트
댓글에서 사용자와 글로의 ManyToOne 관계를 정의했습니다. 이제 User 및 Post 엔티티에서 역방향 OneToMany 관계를 정의해야 합니다.
src/users/user.entity.ts 업데이트:
// src/users/user.entity.ts
import { Entity, Column, PrimaryColumn, OneToMany } from 'typeorm';
import { Comment } from '../comments/comment.entity'; // Comment 임포트

@Entity()
export class User {
  @PrimaryColumn({ type: 'uuid', default: () => 'gen_random_uuid()' })
  id: string;

  @Column({ unique: true })
  username: string;

  @Column()
  password: string;

  @OneToMany(() => Comment, (comment) => comment.user) // 관계 추가
  comments: Comment[];
}
src/posts/post.entity.ts 업데이트:
// src/posts/post.entity.ts
import { Entity, Column, PrimaryColumn, CreateDateColumn, OneToMany } from 'typeorm';
import { Comment } from '../comments/comment.entity'; // Comment 임포트

@Entity()
export class Post {
  @PrimaryColumn({ type: 'uuid', default: () => 'gen_random_uuid()' })
  id: string;

  @Column()
  title: string;

  @Column('text')
  content: string;

  @CreateDateColumn()
  createdAt: Date;

  @OneToMany(() => Comment, (comment) => comment.post) // 관계 추가
  comments: Comment[];
}
2단계: 댓글 서비스 구현
다음으로, 댓글 생성 및 쿼리 로직을 처리할 CommentsService를 작성합니다.
댓글 엔티티 등록
src/comments/comments.module.ts 파일을 열고 TypeOrmModule을 등록한 후 CommentsService를 내보내 다른 모듈에서 사용할 수 있도록 합니다.
// src/comments/comments.module.ts
import { Module } from '@nestjs/common';
import { TypeOrmModule } from '@nestjs/typeorm';
import { CommentsService } from './comments.service';
import { Comment } from './comment.entity';
import { CommentsController } from './comments.controller';

@Module({
  imports: [TypeOrmModule.forFeature([Comment])],
  providers: [CommentsService],
  controllers: [CommentsController],
  exports: [CommentsService], // 서비스 내보내기
})
export class CommentsModule {}
서비스 로직 작성
src/comments/comments.service.ts 파일을 수정하여 댓글 생성 및 쿼리를 위한 메서드를 추가합니다.
// src/comments/comments.service.ts
import { Injectable } from '@nestjs/common';
import { InjectRepository } from '@nestjs/typeorm';
import { Repository } from 'typeorm';
import { Comment } from './comment.entity';
import { Post } from '../posts/post.entity';
import { User } from '../users/user.entity';

@Injectable()
export class CommentsService {
  constructor(
    @InjectRepository(Comment)
    private commentsRepository: Repository<Comment>
  ) {}

  // 게시글 ID별 모든 댓글 조회, 사용자 정보 포함
  findByPostId(postId: string): Promise<Comment[]> {
    return this.commentsRepository.find({
      where: { post: { id: postId } },
      relations: ['user'], // 핵심: 관련된 사용자 객체도 함께 로드
      order: {
        createdAt: 'ASC', // 시간순으로 오름차순 정렬
      },
    });
  }

  // 댓글 생성
  async create(content: string, user: User, post: Post): Promise<Comment> {
    const newComment = this.commentsRepository.create({
      content,
      user,
      post,
    });
    return this.commentsRepository.save(newComment);
  }
}
relations: ['user']는 TypeORM의 매우 유용한 기능입니다. 댓글을 쿼리할 때 외래 키를 통해 관련된user객체를 자동으로 가져와 채우도록 TypeORM에 지시합니다. 이를 통해 댓글 작성자의 사용자 이름을 쉽게 가져올 수 있습니다.
3단계: 댓글 제출 및 표시
이제 댓글 기능을 아티클 페이지에 통합해야 합니다.
이를 위해 CommentsController에 댓글 제출을 허용하는 로직을 추가하고, PostsController를 업데이트하여 아티클 페이지에 댓글을 표시하도록 하겠습니다.
CommentsController 구현
src/comments/comments.controller.ts를 수정합니다.
// src/comments/comments.controller.ts
import { Controller, Post, Body, Param, Req, Res, UseGuards } from '@nestjs/common';
import { CommentsService } from './comments.service';
import { AuthenticatedGuard } from '../auth/authenticated.guard';
import type { Response, Request } from 'express';

@Controller('posts/:postId/comments')
export class CommentsController {
  constructor(private readonly commentsService: CommentsService) {}

  @UseGuards(AuthenticatedGuard) // 로그인한 사용자만 댓글을 작성하도록 보장
  @Post()
  async create(
    @Param('postId') postId: string,
    @Body('content') content: string,
    @Req() req: Request,
    @Res() res: Response
  ) {
    // req.session.user는 express-session에 의해 추가됨
    const { user } = req.session as any;

    // 참고: 실제 애플리케이션에서는 postId가 존재하는지 확인해야 합니다.
    await this.commentsService.create(content, user, { id: postId } as any);

    res.redirect(`/posts/${postId}`); // 댓글을 성공적으로 작성 후 아티클 페이지로 리디렉션
  }
}
PostsController 업데이트
아티클 상세 페이지를 렌더링할 때 해당 아티클의 모든 댓글을 가져와 전달하도록 PostsController의 findOne 메서드를 수정합니다.
먼저, PostsModule에서 CommentsService를 사용할 수 있도록 src/posts/posts.module.ts에 CommentsModule을 임포트합니다.
// src/posts/posts.module.ts
// ...
import { CommentsModule } from '../comments/comments.module';

@Module({
  imports: [TypeOrmModule.forFeature([Post]), CommentsModule], // CommentsModule 임포트
  controllers: [PostsController],
  providers: [PostsService],
})
export class PostsModule {}
그런 다음 src/posts/posts.controller.ts를 업데이트합니다.
// src/posts/posts.controller.ts
import { Controller, Get, Render, Param, Request /* ... */ } from '@nestjs/common';
import { PostsService } from './posts.service';
import { CommentsService } from '../comments/comments.service'; // CommentsService 임포트
// ...

@Controller('posts')
export class PostsController {
  constructor(
    private readonly postsService: PostsService,
    private readonly commentsService: CommentsService // CommentsService 주입
  ) {}

  // ... 다른 메서드는 변경되지 않음

  @Get(':id')
  @Render('post')
  async post(@Param('id') id: string, @Request() req) {
    const post = await this.postsService.findOne(id);
    const comments = await this.commentsService.findByPostId(id); // 댓글 가져오기
    return { post, user: req.session.user, comments }; // 템플릿에 댓글 전달
  }
}
4단계: 프론트엔드 뷰 업데이트
마지막 단계는 EJS 템플릿을 수정하여 댓글 목록과 댓글 폼을 표시하는 것입니다.
views/post.ejs를 열고 글 내용 바로 아래에 다음 코드를 추가합니다.
<a href="/" class="back-link">← Back to Home</a> <section class="comments-section"> <h3>Comments</h3> <div class="comment-list"> <% if (comments.length > 0) { %> <% comments.forEach(comment => { %> <div class="comment-item"> <p class="comment-content"><%= comment.content %></p> <small> By <strong><%= comment.user.username %></strong> on <%= new Date(comment.createdAt).toLocaleDateString() %> </small> </div> <% }) %> <% } else { %> <p>No comments yet. Be the first to comment!</p> <% } %> </div> <% if (user) { %> <form action="/posts/<%= post.id %>/comments" method="POST" class="comment-form"> <h4>Leave a Comment</h4> <div class="form-group"> <textarea name="content" rows="4" placeholder="Write your comment here..." required></textarea> </div> <button type="submit">Submit Comment</button> </form> <% } else { %> <p><a href="/auth/login">Login</a> to leave a comment.</p> <% } %> </section> <%- include('_footer') %>
페이지를 더 보기 좋게 만들려면 public/css/style.css에 스타일을 추가할 수 있습니다.
/* ... 다른 스타일 ... */
.comments-section {
  margin-top: 3rem;
  border-top: 1px solid #eee;
  padding-top: 2rem;
}
.comment-list .comment-item {
  background: #f9f9f9;
  border: 1px solid #ddd;
  padding: 1rem;
  border-radius: 5px;
  margin-bottom: 1rem;
}
.comment-content {
  margin-top: 0;
}
.comment-item small {
  color: #666;
}
.comment-form {
  margin-top: 2rem;
}
.comment-form textarea {
  width: 100%;
  padding: 0.5rem;
  margin-bottom: 1rem;
}
실행 및 테스트
애플리케이션을 다시 시작합니다.
npm run start:dev
브라우저에서 웹페이지를 엽니다: http://localhost:3000/
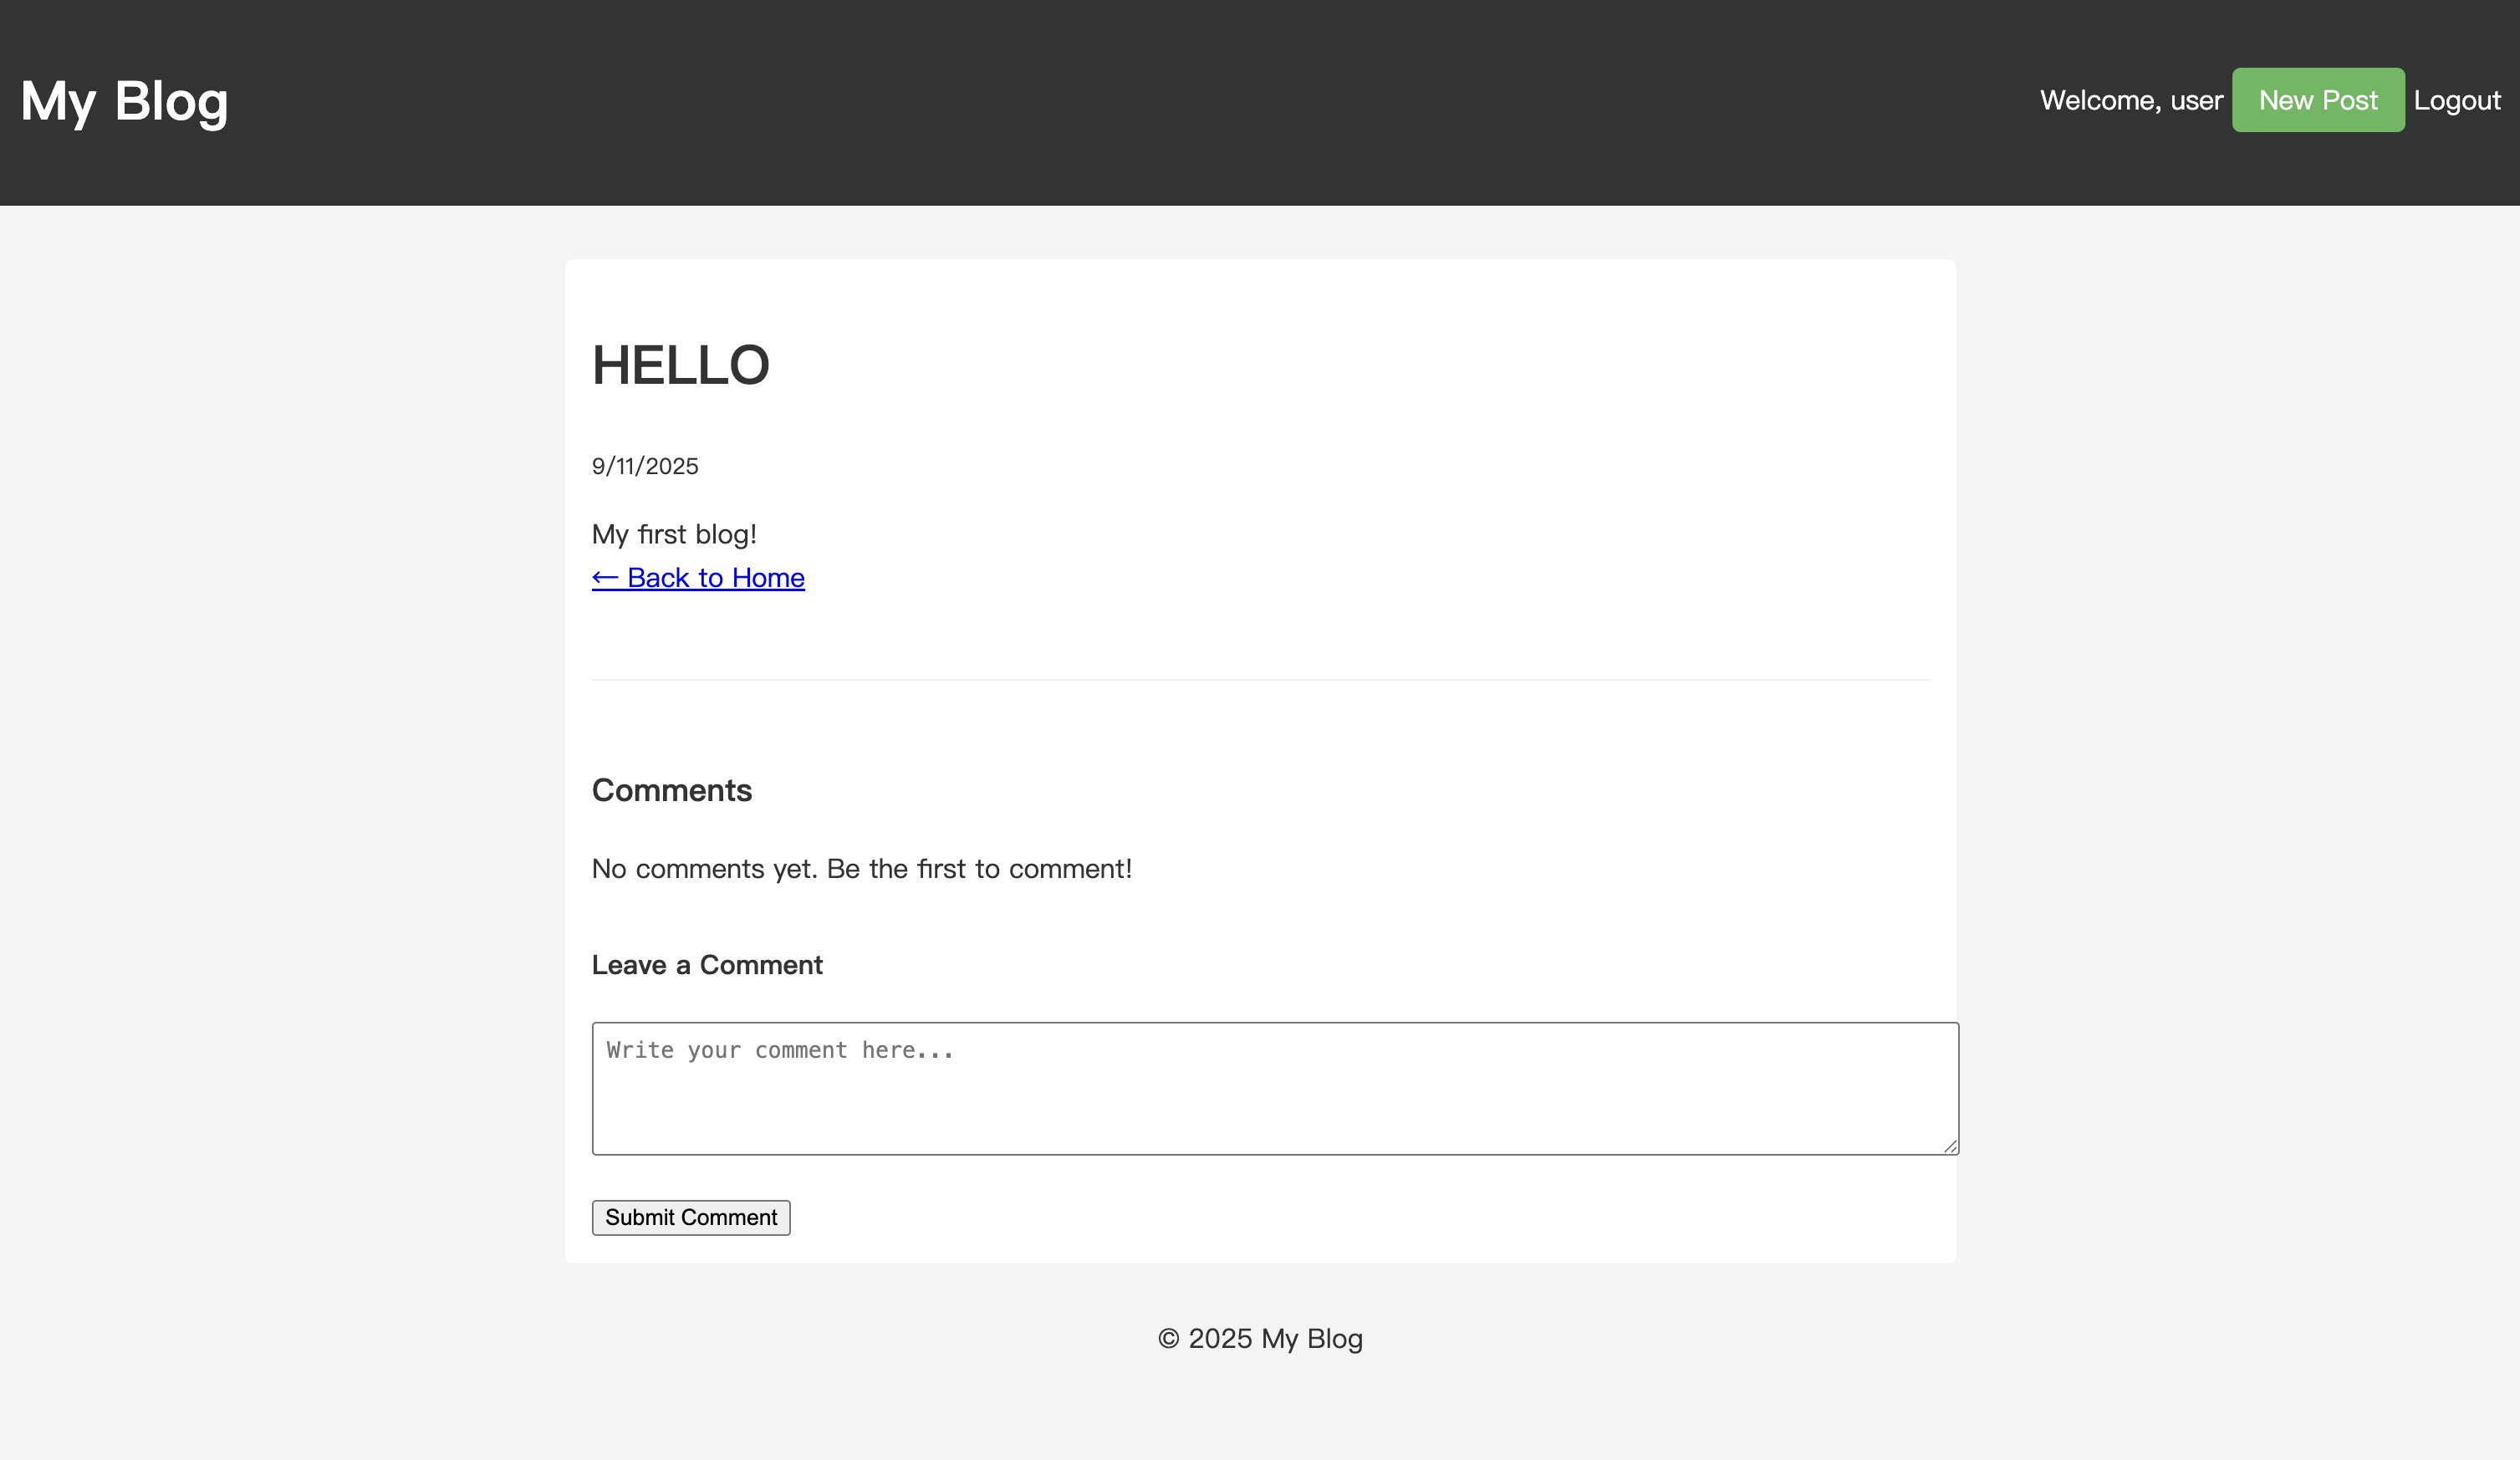
아무 아티클로 이동하면 이제 댓글 섹션이 보일 것입니다.

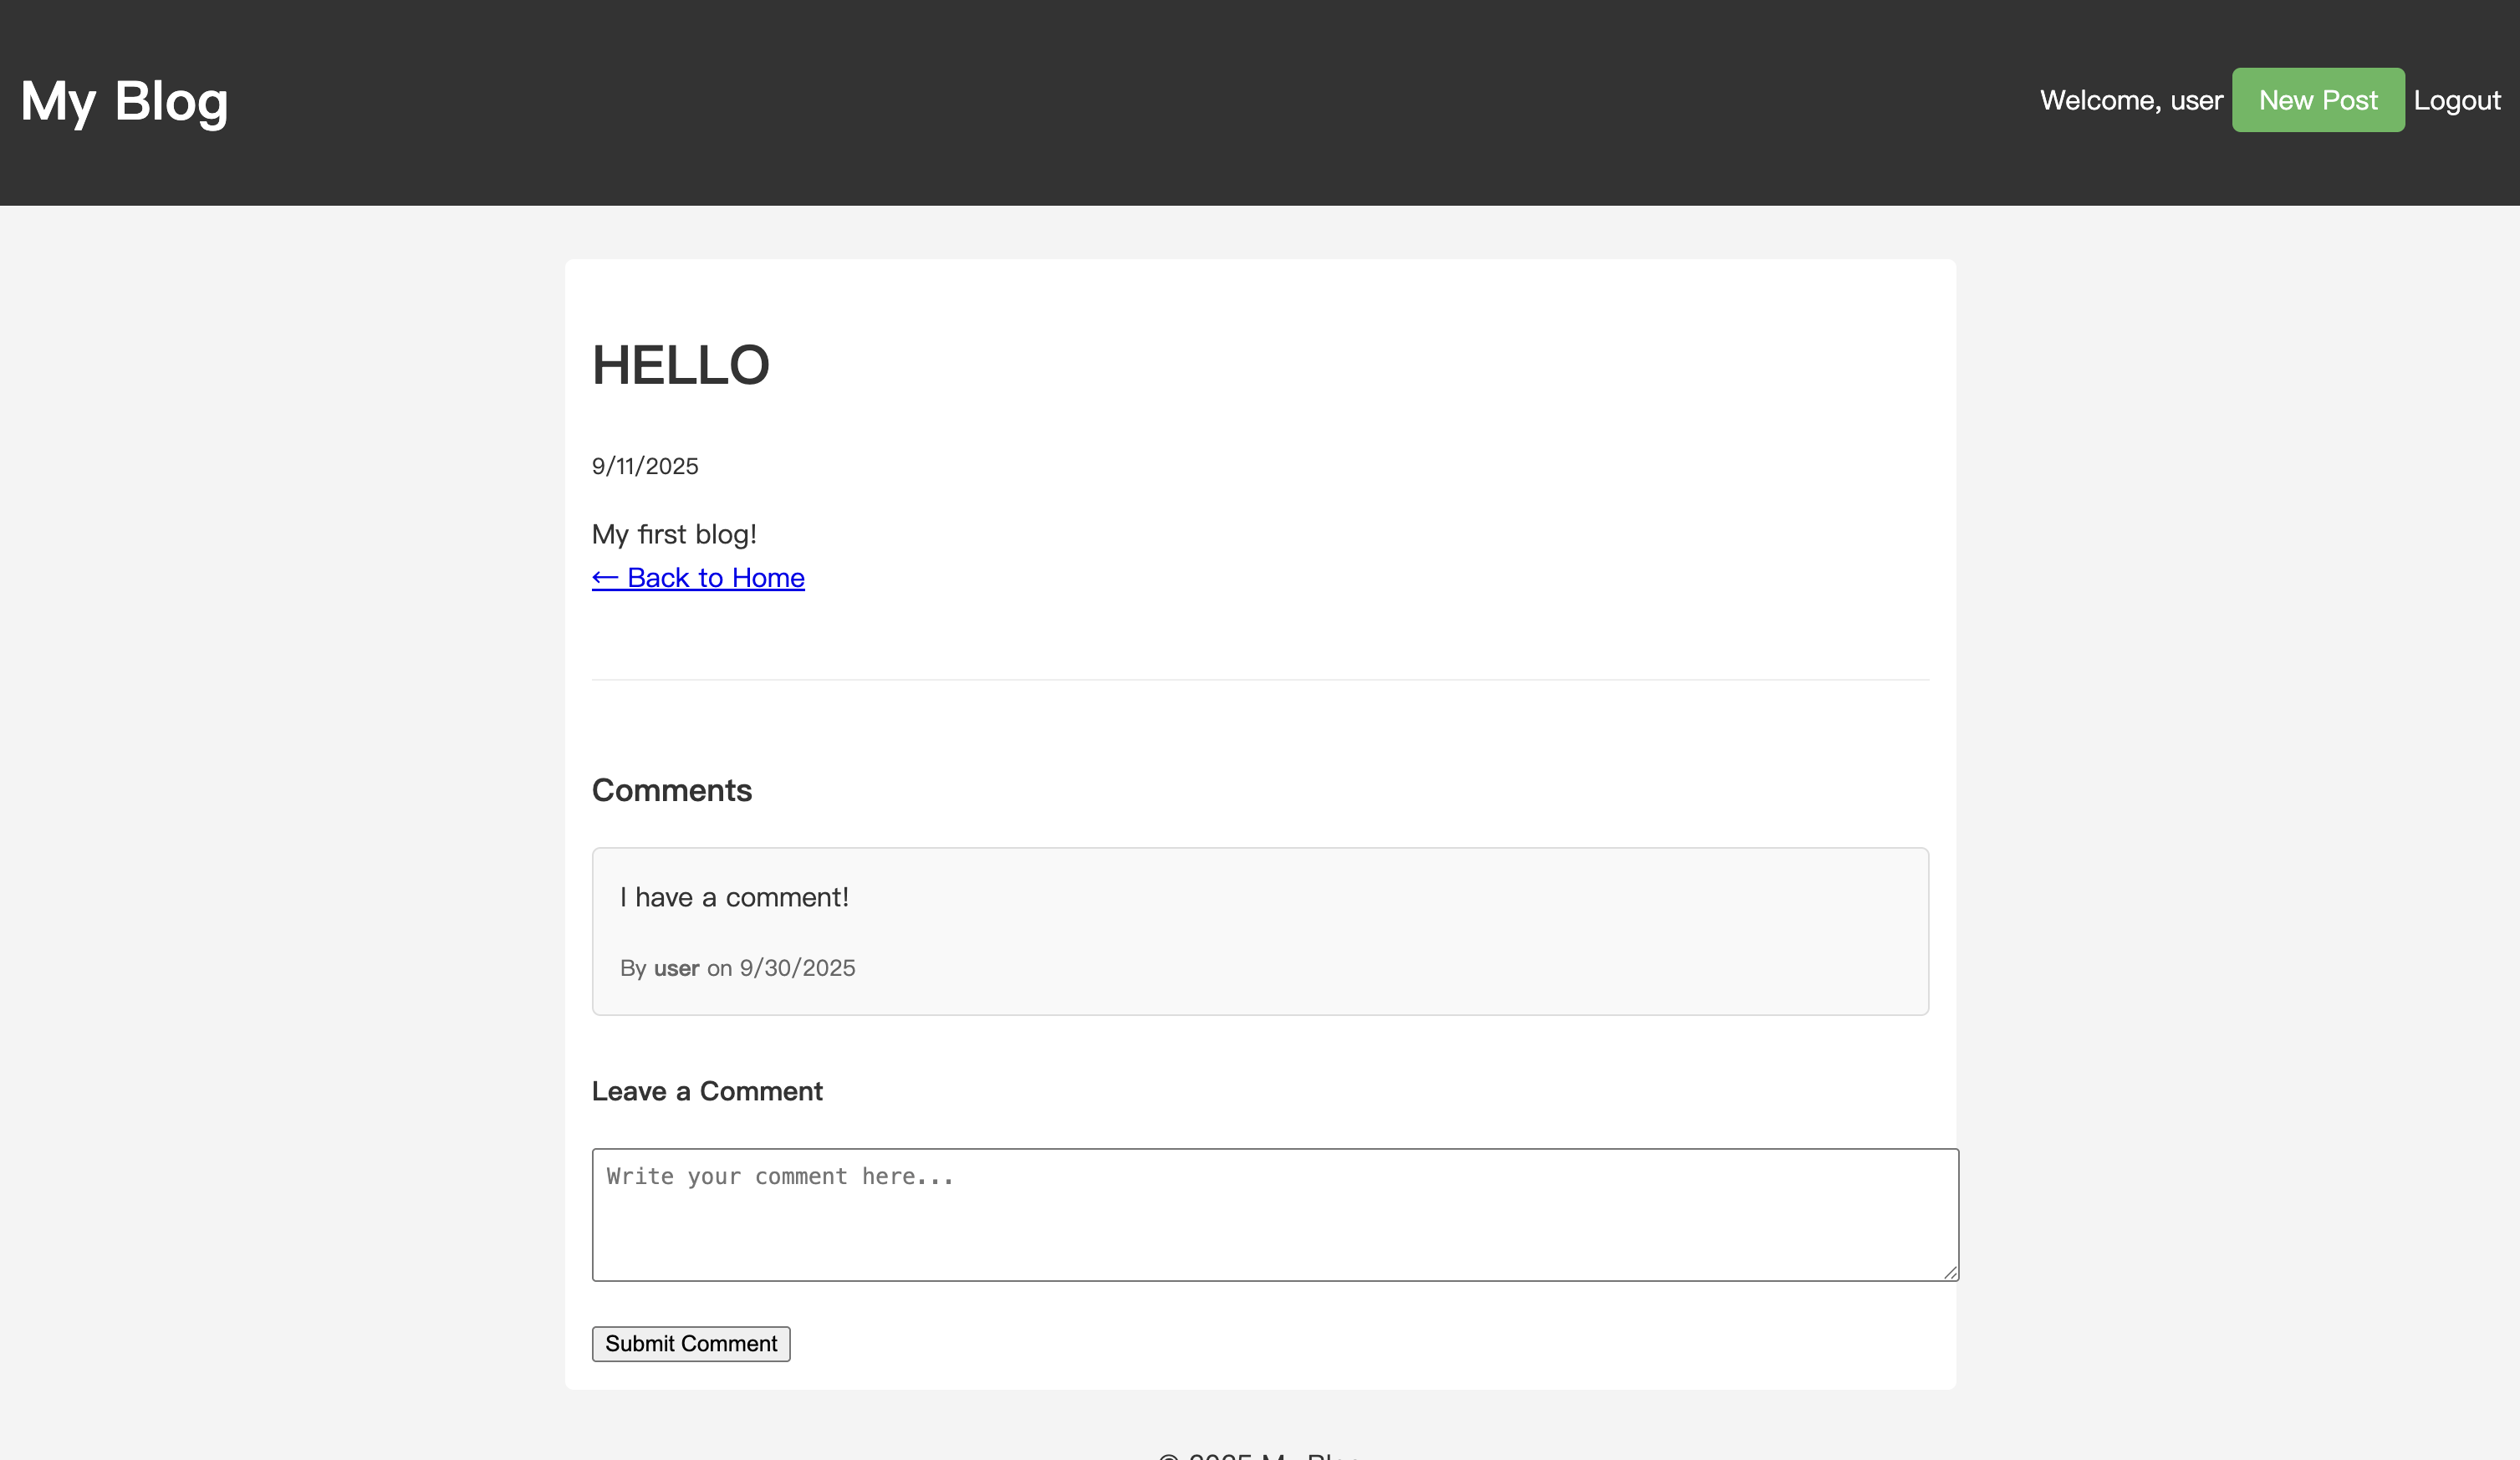
댓글 상자에 내용을 입력하고 제출합니다. 페이지가 새로 고쳐지면 댓글 목록에서 방금 게시한 댓글을 볼 수 있습니다.

축하합니다! 블로그에 댓글 시스템을 성공적으로 추가했습니다!
물론 현재 댓글 기능은 여전히 매우 기본적인 수준입니다. 다음 글에서는 작성자가 댓글에 답글을 다는 기능을 구현하여 블로그의 상호작용성을 한 단계 더 끌어올릴 것입니다.
이전 튜토리얼:
- 훌륭한 Nest.js 블로그 만들기: 인증 추가
- 훌륭한 Nest.js 블로그 만들기: 사용자 시스템 추가
- 첫 코드 작성부터 라이브 배포까지 10분: 초고속 Nest.js 블로그 코스
이전 튜토리얼:

